
使用hugo stack主题快速搭建博客
使用hugo-theme-stack快速搭建个人博客
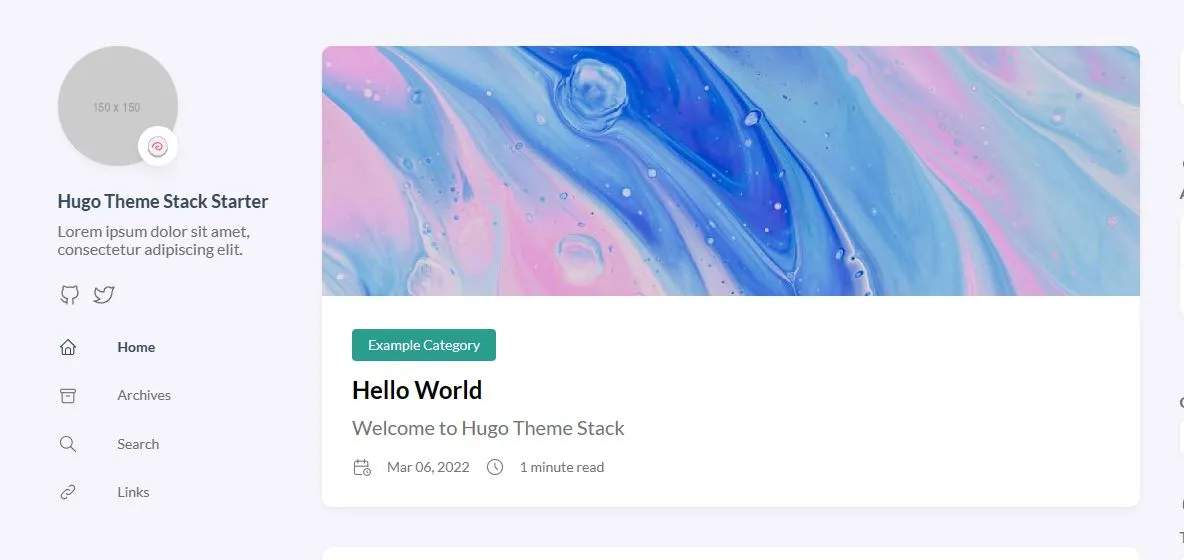
为什么是hugo
hugo 是最受欢迎的开源静态网站生成器之一,使用go语言构建,宣传自己是世界上最快的网络构建框架,拥有丰富的主题。
我的博客已经运行了四年了,目前就是由hugo-stack主题构建。最初是使用vuepress,后来改成了hugo。相比vuepress,hugo构建速度更快,主题更多,资料也更多,更加开箱即用。
对于前端开发者来说,也许自己动手搭建一个自己设计、编码的博客更酷点。但对于像我这样的后端开发者,甚至完全不会编程的人来说,使用hugo来搭建博客,只需要专注于内容创作,挑选一个自己喜欢的主题就可以了。
安装hugo
第一步当然是先安装hugo
MacOS
brew install hugoLinux
sudo snap install hugoWindows平台
choco install hugo-extended当然这是官方的说明,我自己也是用的Windows平台,我选择直接去github下载 可运行的.exe文件。选择hugo_extended_0.123.0_windows-amd64.zip,extended表示是扩展版本,windows-amd64表示是windows平台,64位。下载完成后解压缩,会得到一个hugo.exe文件。
将hugo.exe放入一个任意一个文件夹中,然后把这个文件夹目录加入到系统环境变量path中,此时hugo.exe可以在任意目录下使用
在控制台使用hugo version测试hugo是否安装成功。
hugo version挑选主题
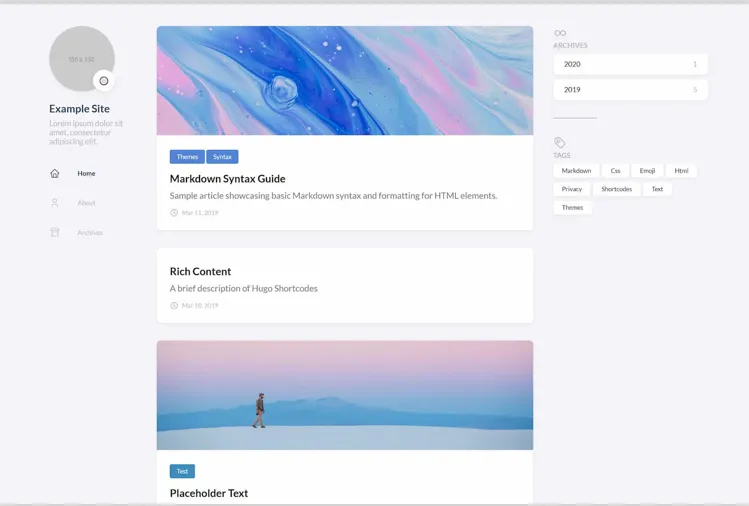
第二步可以直接去挑选喜欢的主题了 主题地址,可以根据不同的类型来进行筛选:比如个人、博客、相册、作品集等等,也可以根据特性筛选:比如深色、响应式、亮色等等。用来做个人博客的话选择Blog分类,稍微安利下我使用的 Stack主题 很适合个人博客网站。
安装主题
一般在主题界面会介绍安装步骤,也有的主题会提供一个在线文档,比如Stack就提供了文档网站 它提供了两种引入主题的方式,我们使用最简单的方式安装。
初始化hugo mod
hugo mod init github.com/me/my-new-blog新建config.yaml文件
# config.yaml
module:
  imports:
    - path: github.com/CaiJimmy/hugo-theme-stack/v3
启动项目
hugo server注意这一步有可能因为网络原因失败。因为要从github上下载hugo主题。有两种解决办法
- 使用代理
set http_proxy=http://127.0.0.1:1080
set https_proxy=http://127.0.0.1:1080- 直接从github下载主题,然后放置在hugo/themes目录下,同时修改config.yaml
theme: hugo-theme-stack打包hugo
# 输出目录 public
hugo
更新主题
hugo mod get -u github.com/CaiJimmy/hugo-theme-stack/v3
hugo mod tidy
编写博客
其实经过上一步的安装主题,已经拥有了一个可以运行、打包、发布的博客了。下面我们来学习如何编写博客
目录结构
要编写博客的话,直接进入content/post目录,新建一个文件夹比如:my-first-post,然后进入文件夹新建一个index.md文件,即可开始写博客了
├── config.yaml  # 配置文件
├── content      # 网站内容根目录
│   ├── page     # 页面目录 about/links/search等
│   ├── categories # 分类目录 自定义分类
│   ├── post     # 文章根目录
│   │   └── my-first-post # 文章文件夹
|   |        └── index.md # 文章文件
|   |        └── image.jpg # 文章图片
│   └── _index.md
markdown写作
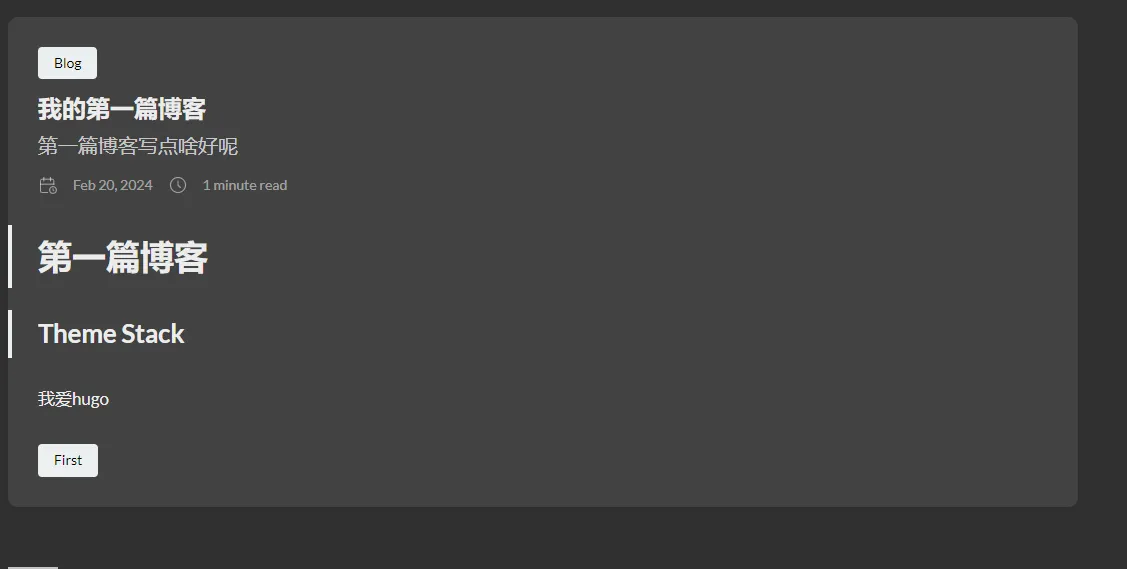
博客是以markdown格式写的,我们可以在下载Vscode作为编辑器,使用markdown语法来写博客。 可以看到上面是博客信息,下面是博客内容。
- title: 博客标题
- slug: 博客url地址,也是唯一标识
- date: 博客创建时间
- description: 博客描述,会显示在标题下方
- categories: 博客分类
- tags: 博客标签
---
title: 我的第一篇博客
slug:  my-first-post
date:  2024-02-20
description: 第一篇博客写点啥好呢
categories:
    - Blog
tags :
    - First
---

# 第一篇博客
## Theme Stack
我爱hugo
保存后即可在浏览器中查看效果,一般hugo server运行在localhost:1313,更改后会自动更新
配置主题
这是官方的配置说明,具体每一项的说明查看官方文档 可以配置的内容非常多,包括多语言、深色主题、侧边栏导航、评论系统等
baseurl: https://example.com
languageCode: en-us
theme: hugo-theme-stack
paginate: 5
title: Example Site

languages:
  en:
    languageName: English
    title: Example Site
    description: Example description
    weight: 1
  zh-cn:
    languageName: 中文
    title: 演示站点
    description: 演示说明
    weight: 2
  ar:
    languageName: عربي
    languagedirection: rtl
    title: موقع تجريبي
    description: وصف تجريبي
    weight: 3

# Change it to your Disqus shortname before using
disqusShortname: hugo-theme-stack

# GA Tracking ID
googleAnalytics:

# Theme i18n support
# Available values: ar, bn, ca, de, el, en, es, fr, hu, id, it, ja, ko, nl, pt-br, th, uk, zh-cn, zh-hk, zh-tw
DefaultContentLanguage: en

# Set hasCJKLanguage to true if DefaultContentLanguage is in [zh-cn ja ko]
# This will make .Summary and .WordCount behave correctly for CJK languages.
hasCJKLanguage: false

permalinks:
  post: /p/:slug/
  page: /:slug/

params:
  mainSections:
    - post
  featuredImageField: image
  rssFullContent: true
  favicon: # e.g.: favicon placed in `static/favicon.ico` of your site folder, then set this field to `/favicon.ico` (`/` is necessary)

  footer:
    since: 2020
    customText:

  dateFormat:
    published: Jan 02, 2006
    lastUpdated: Jan 02, 2006 15:04 MST

  sidebar:
    emoji: 🍥
    subtitle: Lorem ipsum dolor sit amet, consectetur adipiscing elit.
    avatar:
      enabled: true
      local: true
      src: img/avatar.png

  article:
    math: false
    toc: true
    readingTime: true
    license:
      enabled: true
      default: Licensed under CC BY-NC-SA 4.0

  comments:
    enabled: true
    provider: disqus

    disqusjs:
      shortname:
      apiUrl:
      apiKey:
      admin:
      adminLabel:

    utterances:
      repo:
      issueTerm: pathname
      label:

    remark42:
      host:
      site:
      locale:

    vssue:
      platform:
      owner:
      repo:
      clientId:
      clientSecret:
      autoCreateIssue: false

    # Waline client configuration see: https://waline.js.org/en/reference/component.html
    waline:
      serverURL:
      lang:
      pageview:
      emoji:
        - https://unpkg.com/@waline/emojis@1.0.1/weibo
      requiredMeta:
        - name
        - email
        - url
      locale:
        admin: Admin
        placeholder:

    twikoo:
      envId:
      region:
      path:
      lang:

    # See https://cactus.chat/docs/reference/web-client/#configuration for description of the various options
    cactus:
      defaultHomeserverUrl: 'https://matrix.cactus.chat:8448'
      serverName: 'cactus.chat'
      siteName: '' # You must insert a unique identifier here matching the one you registered (See https://cactus.chat/docs/getting-started/quick-start/#register-your-site)

    giscus:
      repo:
      repoID:
      category:
      categoryID:
      mapping:
      lightTheme:
      darkTheme:
      reactionsEnabled: 1
      emitMetadata: 0

    gitalk:
      owner:
      admin:
      repo:
      clientID:
      clientSecret:

    cusdis:
      host:
      id:
  widgets:
    homepage:
      - type: search
      - type: archives
        params:
          limit: 5
      - type: categories
        params:
          limit: 10
      - type: tag-cloud
        params:
          limit: 10
    page:
      - type: toc

  opengraph:
    twitter:
      # Your Twitter username
      site:

      # Available values: summary, summary_large_image
      card: summary_large_image

  defaultImage:
    opengraph:
      enabled: false
      local: false
      src:

  colorScheme:
    # Display toggle
    toggle: true

    # Available values: auto, light, dark
    default: auto

  imageProcessing:
    cover:
      enabled: true
    content:
      enabled: true

### Custom menu
### See https://docs.stack.jimmycai.com/configuration/custom-menu.html
### To remove about, archive and search page menu item, remove `menu` field from their FrontMatter
menu:
  main: []

  social:
    - identifier: github
      name: GitHub
      url: https://github.com/CaiJimmy/hugo-theme-stack
      params:
        icon: brand-github

    - identifier: twitter
      name: Twitter
      url: https://twitter.com
      params:
        icon: brand-twitter

related:
  includeNewer: true
  threshold: 60
  toLower: false
  indices:
    - name: tags
      weight: 100

    - name: categories
      weight: 200

markup:
  goldmark:
    renderer:
      ## Set to true if you have HTML content inside Markdown
      unsafe: false
  tableOfContents:
    endLevel: 4
    ordered: true
    startLevel: 2
  highlight:
    noClasses: false
    codeFences: true
    guessSyntax: true
    lineNoStart: 1
    lineNos: true
    lineNumbersInTable: true
    tabWidth: 4
打包部署
经过了安装、编写博客、配置主题,接下来就该打包和部署了。 打包命令很简单
hugo上传代码仓库
首先我想您应该选择一个代码仓库,比如github或者gitee,把代码放到这个仓库中,记得上传.gitignore。
public
resources
themes
cloudflare pages部署
github和cloudflare都提供免费的前端页面部署,我自己使用的是cloudflare pages。首先先去注册一个cloudflare账号 cloudflare。
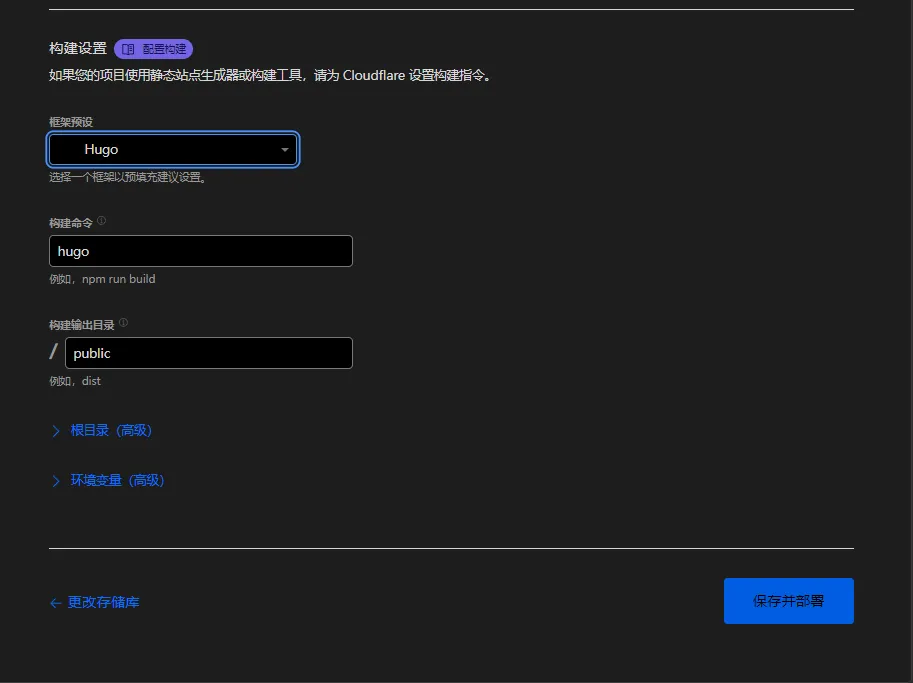
然后进入Workers Pages栏目,点击创建应用程序,选择从现有git项目中创建,然后链接到你的github或者gitlab,选择你的储存库。
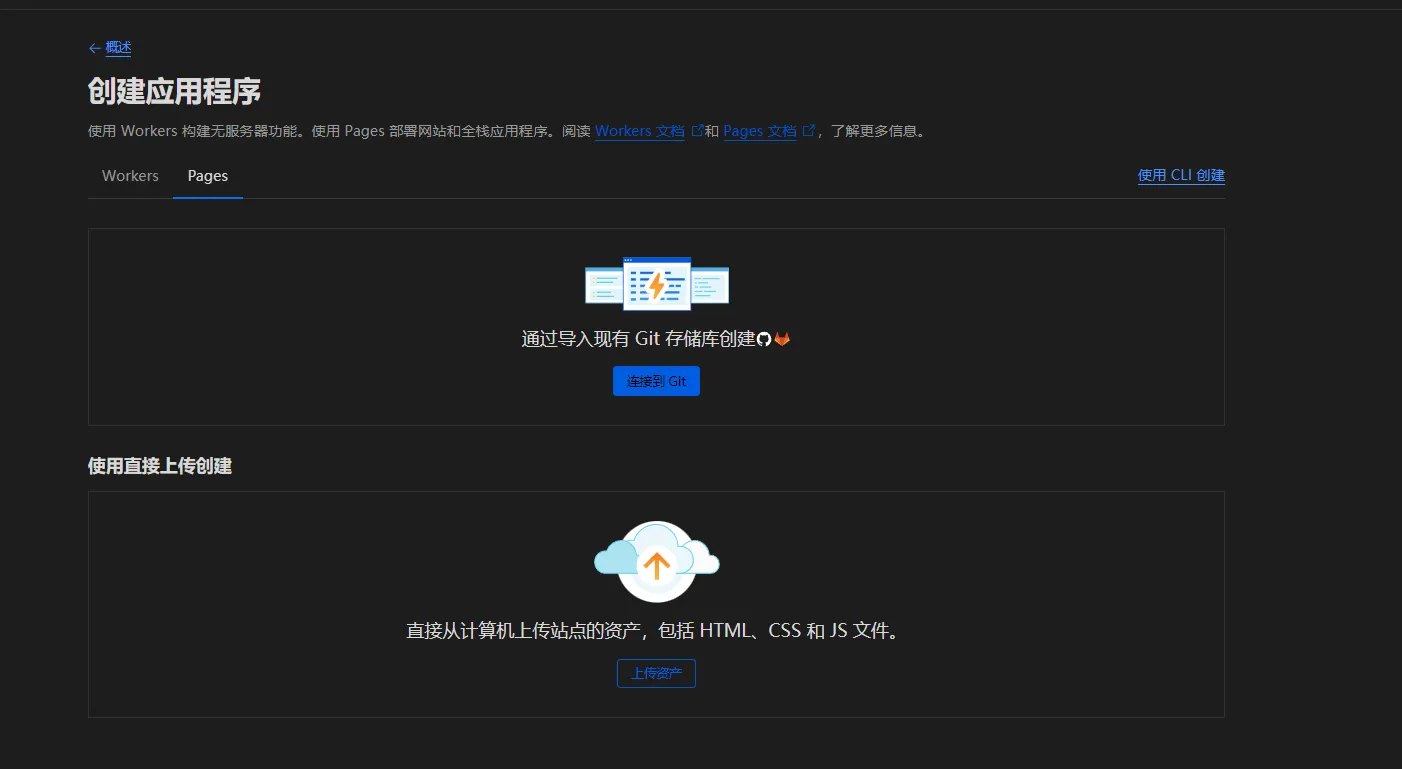
选择框架中找到Hugo,选择生产分支,点击保存并部署即可。这样你的站点就部署成功了,可以使用xxx.pages.dev来访问。相当于cloudflare提供了服务器、测试域名和自动构建,你上传到github仓库,cloudflare会自动拉取代码,打包更新。
域名购买
如果你不满足分配的域名,可以购买域名。在cloudflare点击注册域名,不到10美刀可以购买一年的.com域名。然后在pages设置自定义域,填写你购买的域名,就可以用域名来访问博客了。
大功告成
恭喜你,如果按照我上面的步骤,你已经完成了博客的搭建。当然虽然我写了看似很多,一些步骤对于没有编程经验的人来说还是会遇到一些问题。比如如何加入系统环境变量,如何使用vscode编码,如何安装git,如何使用github等等。不过我想这些问题都可以通过搜索引擎或者ai搜索解决,查找资料也是一个很重要的过程。我当初也是看了别人分享的搭建博客教程,一步步构建了自己的博客,还是挺激动的。
在2024年了,写博客也许不再是一个潮流的事情,但在广阔的互联网世界里,拥有自己专属的域名和博客,并且坚持写作,也是一件挺酷的事。
如果本文对您有所启发或帮助,欢迎点赞鼓励或请博主喝杯咖啡!